Bringing Your Own Data into Microsoft 365 Copilot (Without Breaking Security)
When people first see Microsoft 365 Copilot, the first questions are usually fun:
- “Summarise this document.”
- “Draft a reply to this email.”
Nice for demos – but not why I’m interested.
The interesting part starts when you ask Copilot things like:
- “How do we deploy project Phoenix?”
- “What did we decide about feature X last quarter?”
- “Show me our API guidelines.”
Those answers live in your own systems: SharePoint, Confluence, Jira, custom apps, file shares. Bringing that data into Copilot is where the value is – and where you can easily break security if you’re not careful.
In this post I want to give a pragmatic overview of how to:
- bring your own data into Microsoft 365 Copilot,
- understand where security trimming happens,
- and actively prevent certain things from being answered at all.
Code is copy‑paste‑able; adapt it to your stack.
1. Three main paths for your own data
Simplified, you have three options:
- Data already in M365
SharePoint, OneDrive, Teams, Exchange – indexed by Microsoft Search/Graph out of the box. - External content via Microsoft Graph connectors
Confluence, Jira, on‑prem file shares, custom data – indexed asexternalItemobjects. - Custom agents/plugins that call your APIs at runtime
For live data and actions.
We’ll go through each with one question in mind: who decides what the user is allowed to see?
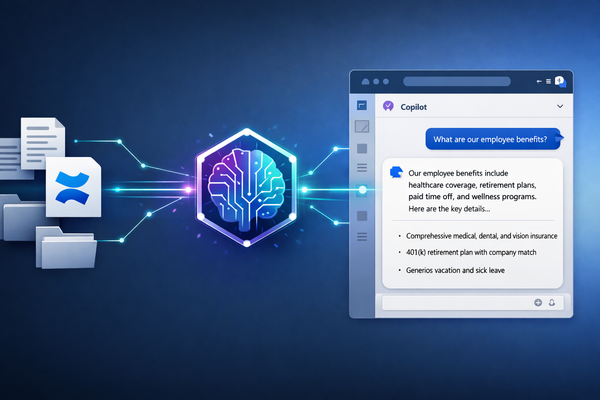
2. Data already in M365: Graph trims for you
For content living in SharePoint/OneDrive/Teams/Exchange, the flow looks like this:
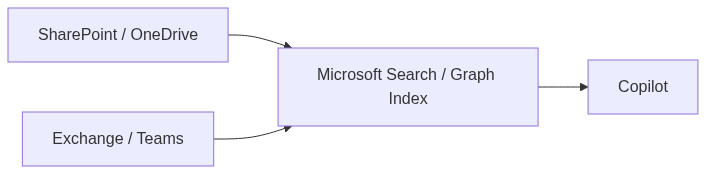
Security trimming happens in Graph/Search:
- Items have ACLs tied to users/groups.
- Graph only returns items the current user can see.
Your job here ist „nur“:
- Docs, die für Copilot relevant sein sollen, wirklich nach M365 ziehen.
- Berechtigungen in SharePoint/Teams sinnvoll pflegen (keine „Everyone“-Rechte auf sensible Sites).
- Nicht am Graph vorbei direkt auf Datenbanken/Storage zugreifen.
Wenn du nichts anderes tust, ist „erstmal alles in M365 ordentlich ablegen“ der wichtigste Schritt.
3. External content: Graph connectors + ACLs
Für Systeme, die nicht in M365 leben können oder sollen (Confluence, on‑prem shares, Legacy‑Apps), sind Microsoft Graph connectors das Mittel der Wahl.
Ein Connector:
- zieht oder erhält Items aus einem externen System,
- legt sie als
externalItemin einerexternalConnectionim Graph ab, - und versieht sie mit einer
acl, die Security Trimming steuert.
3.1. Connection anlegen
// src/graphConnection.ts
import fetch from 'node-fetch';

const GRAPH_BASE = 'https://graph.microsoft.com/v1.0';

async function getAppToken(): Promise<string> {
  // Implement client credentials flow for your app registration
  // return access token with ExternalConnection.ReadWrite.All etc.
  return '<token>';
}

export async function createExternalConnection(connectionId: string, name: string, description: string) {
  const token = await getAppToken();

  const res = await fetch(`${GRAPH_BASE}/external/connections`, {
    method: 'POST',
    headers: {
      'Content-Type': 'application/json',
      'Authorization': `Bearer ${token}`
    },
    body: JSON.stringify({ id: connectionId, name, description })
  });

  if (!res.ok) {
    console.error('Failed to create connection', await res.text());
    throw new Error('graph_error');
  }
}
3.2. Items mit ACLs pushen
Angenommen, du ziehst Seiten aus Confluence und bekommst:
type SourcePage = {
  id: string;
  title: string;
  url: string;
  body: string;
  allowedUsers: string[];     // AAD IDs oder UPNs
  forbiddenUsers?: string[];  // optional: explizite Ausschlüsse
};
Du kannst das in ein externalItem mit acl mappen:
// src/graphItems.ts
import fetch from 'node-fetch';

const GRAPH_BASE = 'https://graph.microsoft.com/v1.0';
const CONNECTION_ID = 'contosoConfluence';

async function pushExternalItem(page: SourcePage) {
  const token = await getAppToken();

  const grantAcl = page.allowedUsers.map(userId => ({
    type: 'user',
    value: userId,
    accessType: 'grant' as const
  }));

  const denyAcl = (page.forbiddenUsers ?? []).map(userId => ({
    type: 'user',
    value: userId,
    accessType: 'deny' as const
  }));

  const item = {
    id: page.id,
    properties: {
      title: page.title,
      url: page.url
    },
    content: {
      type: 'text',
      value: page.body
    },
    acl: [...grantAcl, ...denyAcl]
  };

  const res = await fetch(
    `${GRAPH_BASE}/external/connections/${CONNECTION_ID}/items/${page.id}`,
    {
      method: 'PUT',
      headers: {
        'Content-Type': 'application/json',
        'Authorization': `Bearer ${token}`
      },
      body: JSON.stringify(item)
    }
  );

  if (!res.ok) {
    console.error('Failed to push externalItem', await res.text());
    throw new Error('graph_error');
  }
}
Wichtig:
- Security Trimming hängt an dieser ACL. Wenn hier Mist steht, sieht Copilot denselben Mist.
- „Forbidden“‑User kannst du mit
accessType: 'deny'explizit ausschließen (je nach Szenario sinnvoll).
Ab dann behandelt Microsoft Search/Copilot diese Items wie native Inhalte – natürlich nur, wenn du sie im Copilot‑Scope aktiviert hast.
4. Custom Agents: Live-Daten mit eigenem Backend
Connectors sind super für „Was wissen wir?“‑Fragen. Für „Was ist gerade der Status?“ oder „Leg ein Ticket an“ brauchst du eine HTTP‑Schnittstelle, an die Copilot Tools/Agents Aufrufe schicken können.
Architektur:

Hier liegt Security Trimming komplett bei dir.
4.1. User-Kontext und Rollen
// src/permissions.ts
export type UserContext = {
  email: string;
  roles: string[];   // e.g. ['EMPLOYEE', 'HR', 'ENGINEERING_MANAGER']
  groups: string[];  // e.g. ['project-phoenix', 'dept-engineering']
};

export async function getUserPermissions(email: string): Promise<UserContext | null> {
  const entry = await directoryLookup(email); // Implement: query Entra ID / your IAM
  if (!entry) return null;

  return {
    email,
    roles: entry.roles,
    groups: entry.groups
  };
}
4.2. ACL für externe Dokumente
// src/acl.ts
import { UserContext } from './permissions';

export type DocumentAcl = {
  allowedRoles?: string[];
  allowedGroups?: string[];
  forbiddenRoles?: string[];
};

export type ExternalDoc = {
  id: string;
  title: string;
  url: string;
  content: string;
  acl: DocumentAcl;
};

function hasAccess(doc: ExternalDoc, user: UserContext): boolean {
  const { allowedRoles, allowedGroups, forbiddenRoles } = doc.acl;

  if (forbiddenRoles && forbiddenRoles.some(r => user.roles.includes(r))) {
    return false;
  }

  // default: visible to all employees if nothing is specified
  if (!allowedRoles && !allowedGroups) {
    return true;
  }

  if (allowedRoles && allowedRoles.some(r => user.roles.includes(r))) {
    return true;
  }

  if (allowedGroups && allowedGroups.some(g => user.groups.includes(g))) {
    return true;
  }

  return false;
}

export function filterDocsByAcl(docs: ExternalDoc[], user: UserContext): ExternalDoc[] {
  return docs.filter(doc => hasAccess(doc, user));
}
4.3. Agent-Endpoint mit Trimming und Query-Guard
Jetzt der eigentliche Handler, den Copilot aufruft:
// src/copilotAgent.ts
import { Request, Response } from 'express';
import { getUserPermissions } from './permissions';
import { searchSystemDocs } from './systemDocs';
import { buildAnswerFromDocs } from './rag';

interface AskRequest {
  question: string;
  userEmail: string;
}

interface AskResponse {
  answer: string;
  sources: { title: string; url: string }[];
}

// Simple guard against disallowed topics
function isForbiddenQuestion(question: string, userRoles: string[]): boolean {
  const lower = question.toLowerCase();

  // Example: HR-only topics
  const sensitivePatterns = [
    'salary',
    'compensation',
    'layoff',
    'termination list',
    'performance review'
  ];

  const isSensitive = sensitivePatterns.some(p => lower.includes(p));

  if (!isSensitive) return false;

  // Only allow HR / C-level roles to ask these topics
  const privilegedRoles = ['HR', 'HR_ADMIN', 'C_LEVEL'];
  const isPrivileged = privilegedRoles.some(r => userRoles.includes(r));

  return !isPrivileged;
}

export async function copilotAgentHandler(req: Request, res: Response) {
  const body = req.body as AskRequest;

  if (!body.question || !body.userEmail) {
    return res.status(400).json({ error: 'question and userEmail are required' });
  }

  const user = await getUserPermissions(body.userEmail);
  if (!user) {
    return res.status(403).json({ error: 'unknown_user' });
  }

  // 1) Block certain topics for non-privileged roles
  if (isForbiddenQuestion(body.question, user.roles)) {
    return res.json({
      answer: "I’m not allowed to answer this type of question for your role.",
      sources: []
    } satisfies AskResponse);
  }

  // 2) Query docs with ACL
  const docs = await searchSystemDocs(body.question, user);

  if (docs.length === 0) {
    return res.json({
      answer: `I couldn't find any documents you are allowed to see that answer "${body.question}".`,
      sources: []
    } satisfies AskResponse);
  }

  // 3) Build answer via LLM
  const { answer, usedDocs } = await buildAnswerFromDocs(body.question, docs);

  const response: AskResponse = {
    answer,
    sources: usedDocs.map(d => ({ title: d.title, url: d.url }))
  };

  return res.json(response);
}
Damit hast du zwei Ebenen von Schutz:
- Topic Guard: bestimmte Fragen werden für normale Rollen gar nicht erst beantwortet.
- ACL-Filter: selbst wenn die Frage erlaubt ist, kommen nur Dokumente durch, deren ACL zum User passt.
5. Decision table: which path to use when
| Scenario | Recommended path | Security trimming |
|---|---|---|
| Docs already in SharePoint/OneDrive/Teams | Native M365 (Graph) | Graph enforces ACLs; keep SharePoint/Teams permissions tidy. |
| External wiki / KB (Confluence, CMS) with mostly read-only content | Graph connector | You attach ACLs per item (acl); Graph trims based on user token. |
| On-prem file shares | File share / Azure Files connector | Connector maps original ACLs to AAD identities; Graph handles trimming. |
| Live line-of-business data (status, metrics, actions) | Custom agent + backend API | Your backend enforces roles/groups + topic guards before every call. |
| Highly sensitive HR/legal data | Separate, role-specific agents or no Copilot access | Explicitly exclude from generic agents; only scoped tools for HR/legal. |
6. Guardrails I’d put in place
Unabhängig vom Weg würde ich ein paar Regeln fest einbauen:
- Kein God-Mode-Service-Account ohne weiteren Filter
Wenn ein Agent mit einem Konto liest, das alles sieht, brauchst du zwingend ein ACL-Filter im Backend (wie oben). - Logging
Logge (mindestens intern), welcher Agent für welchen User welche Systeme abgefragt hat – nicht unbedingt den kompletten Content, sondern Metadaten. - „No-go“-Daten explizit ausschließen
Es ist okay zu sagen: „Bestimmte HR-/Legal- oder Security-Daten tauchen in Copilot nie auf.“ Bau diese Ausschlüsse bewusst ein. - Start small
Lieber zwei gut abgesicherte Datenquellen als zehn halbgar integrierte.
7. Fazit
„Bring your own data“ für Microsoft 365 Copilot ist kein einziger Schalter, sondern eine Reihe von Entscheidungen:
- Was gehört in M365 selbst?
- Was wird über Graph Connectors indexiert?
- Was braucht einen eigenen Agenten, der live mit Systemen redet?
- Und wo sagen wir bewusst: „Das bleibt außerhalb der Reichweite von Copilot“?
Wenn du jede dieser Entscheidungen mit Security Trimming im Kopf triffst, kann Copilot viel näher an das kommen, was du in Meetings ständig hörst: „Frag doch mal jemanden, der sich auskennt.“ Nur dass „jemand“ diesmal ein Agent ist, der deine Daten kennt – aber nicht mehr, als er kennen darf.