
Build your own singing tree Christmas light
Singing Tree Christmas Light
Hey, Christmas was a wonderful time. So a nice Atmosphere and… sure Christmas lights. But I’m bored with hanging on the default bulbs around a tree or hanging some things at the fence. I want a new fancy style… a cool thing… and also a project that can my 8 years old do with me. The idea of the singing tree was born.
My Bucketlist
Let me show what I used for my project:
- 5 x WS2811 LED’s strip
- 1 x twin-wall-sheet (10 mm)
- Solder wires (black, red, white)
- 1 x ESP Dev kit
- 1x Power Adapter (5v / 40A)
- 1x USB cable
- 1 x FM Transmitter
The first Challenge: Find the correct LEDs
First of all, we need the lights, but each light must be controlled separately with brightness and color. After a short google search, I found the WS2811 Led bulbs. They are perfect because they are designed for outdoor and each led in this strip can be controlled separately. In fact, I used 5 Led Strips (each one with 3.5 Meters) so think about buying enough LEDs.
The second Challenge: The used surface
Sure, I can mount it onto a wooden board, but this is very heavy for hanging around in a nursery. When it falls down for some reason and hits my son. That was not a good idea. So I need some other surface, after a little walkthrough in my local home improvement store, I saw a twin-wall sheet. This Is perfect.
Singing Tree! Assemble
First of all, I measure the window size, to fit in the tree. After that, I cut the sheet into this shape.
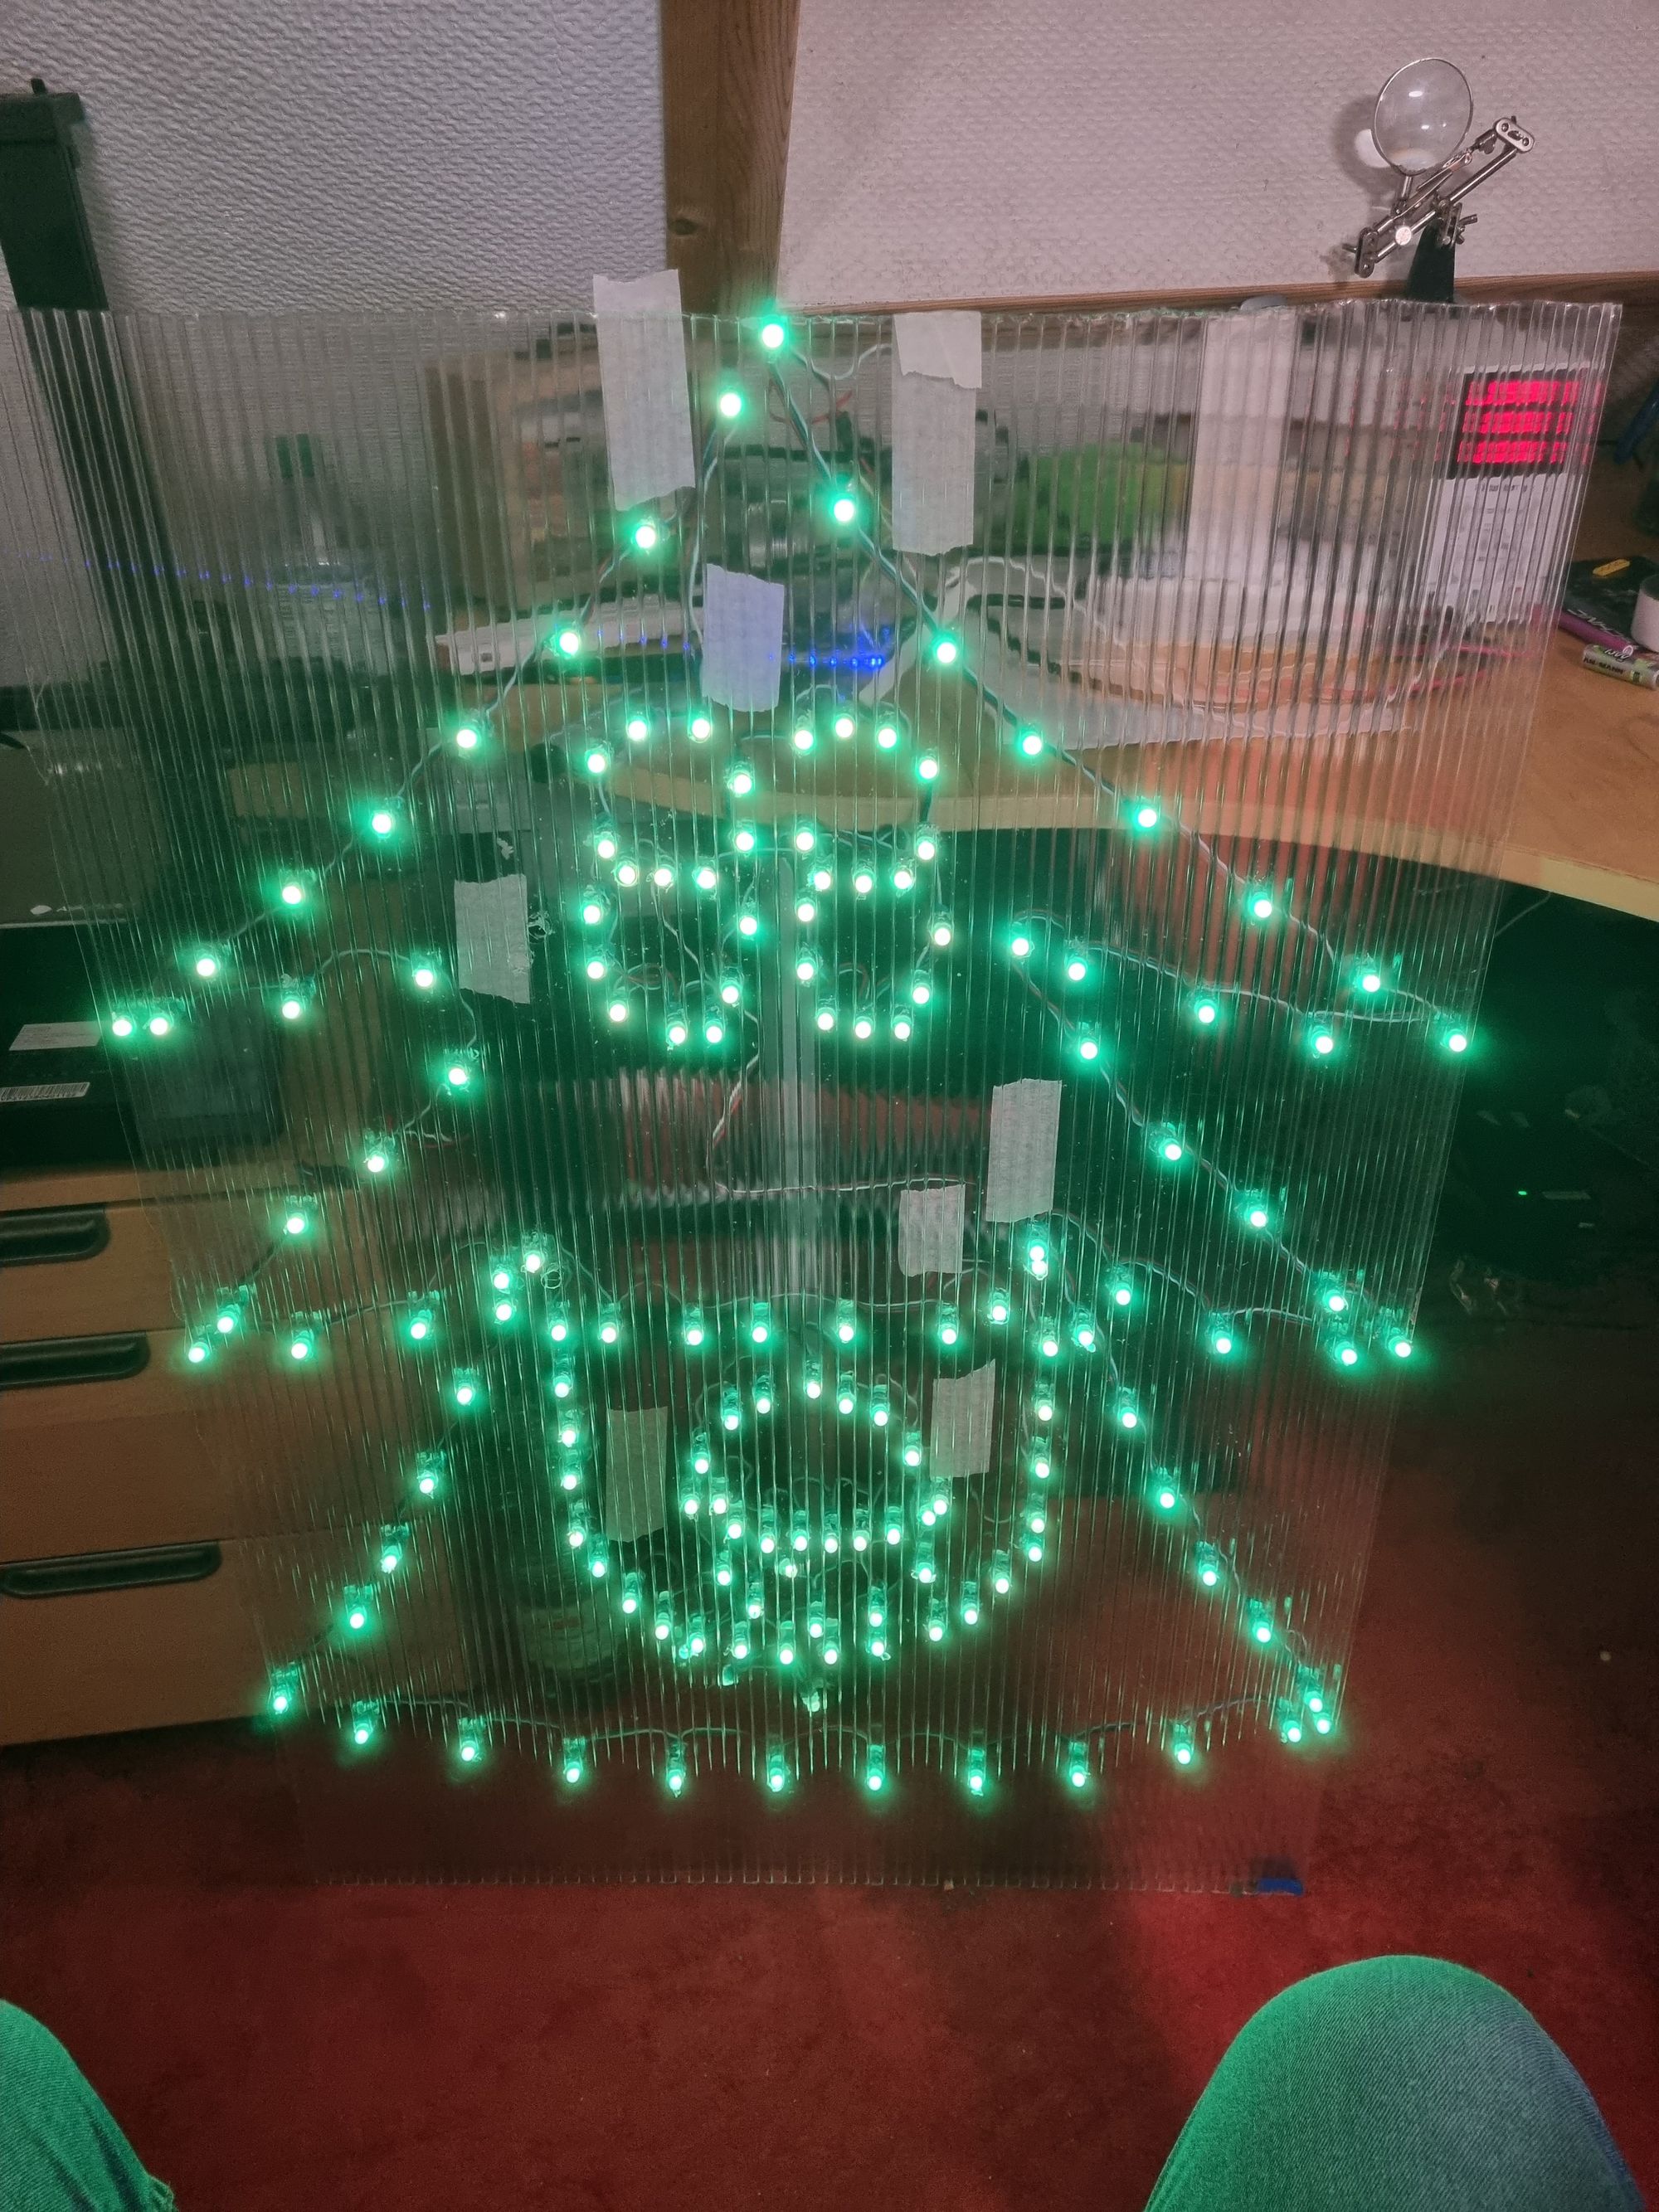
Next, the important part. I drew a line of the tree onto the sheet (several Times!!!), I must admit that I am not good at drawing. So important to know is, that we must have a symmetrical tree design. After that, I drew the Eyes, two round ones, and a line through the middle. So I can show later the eyes open and closed.
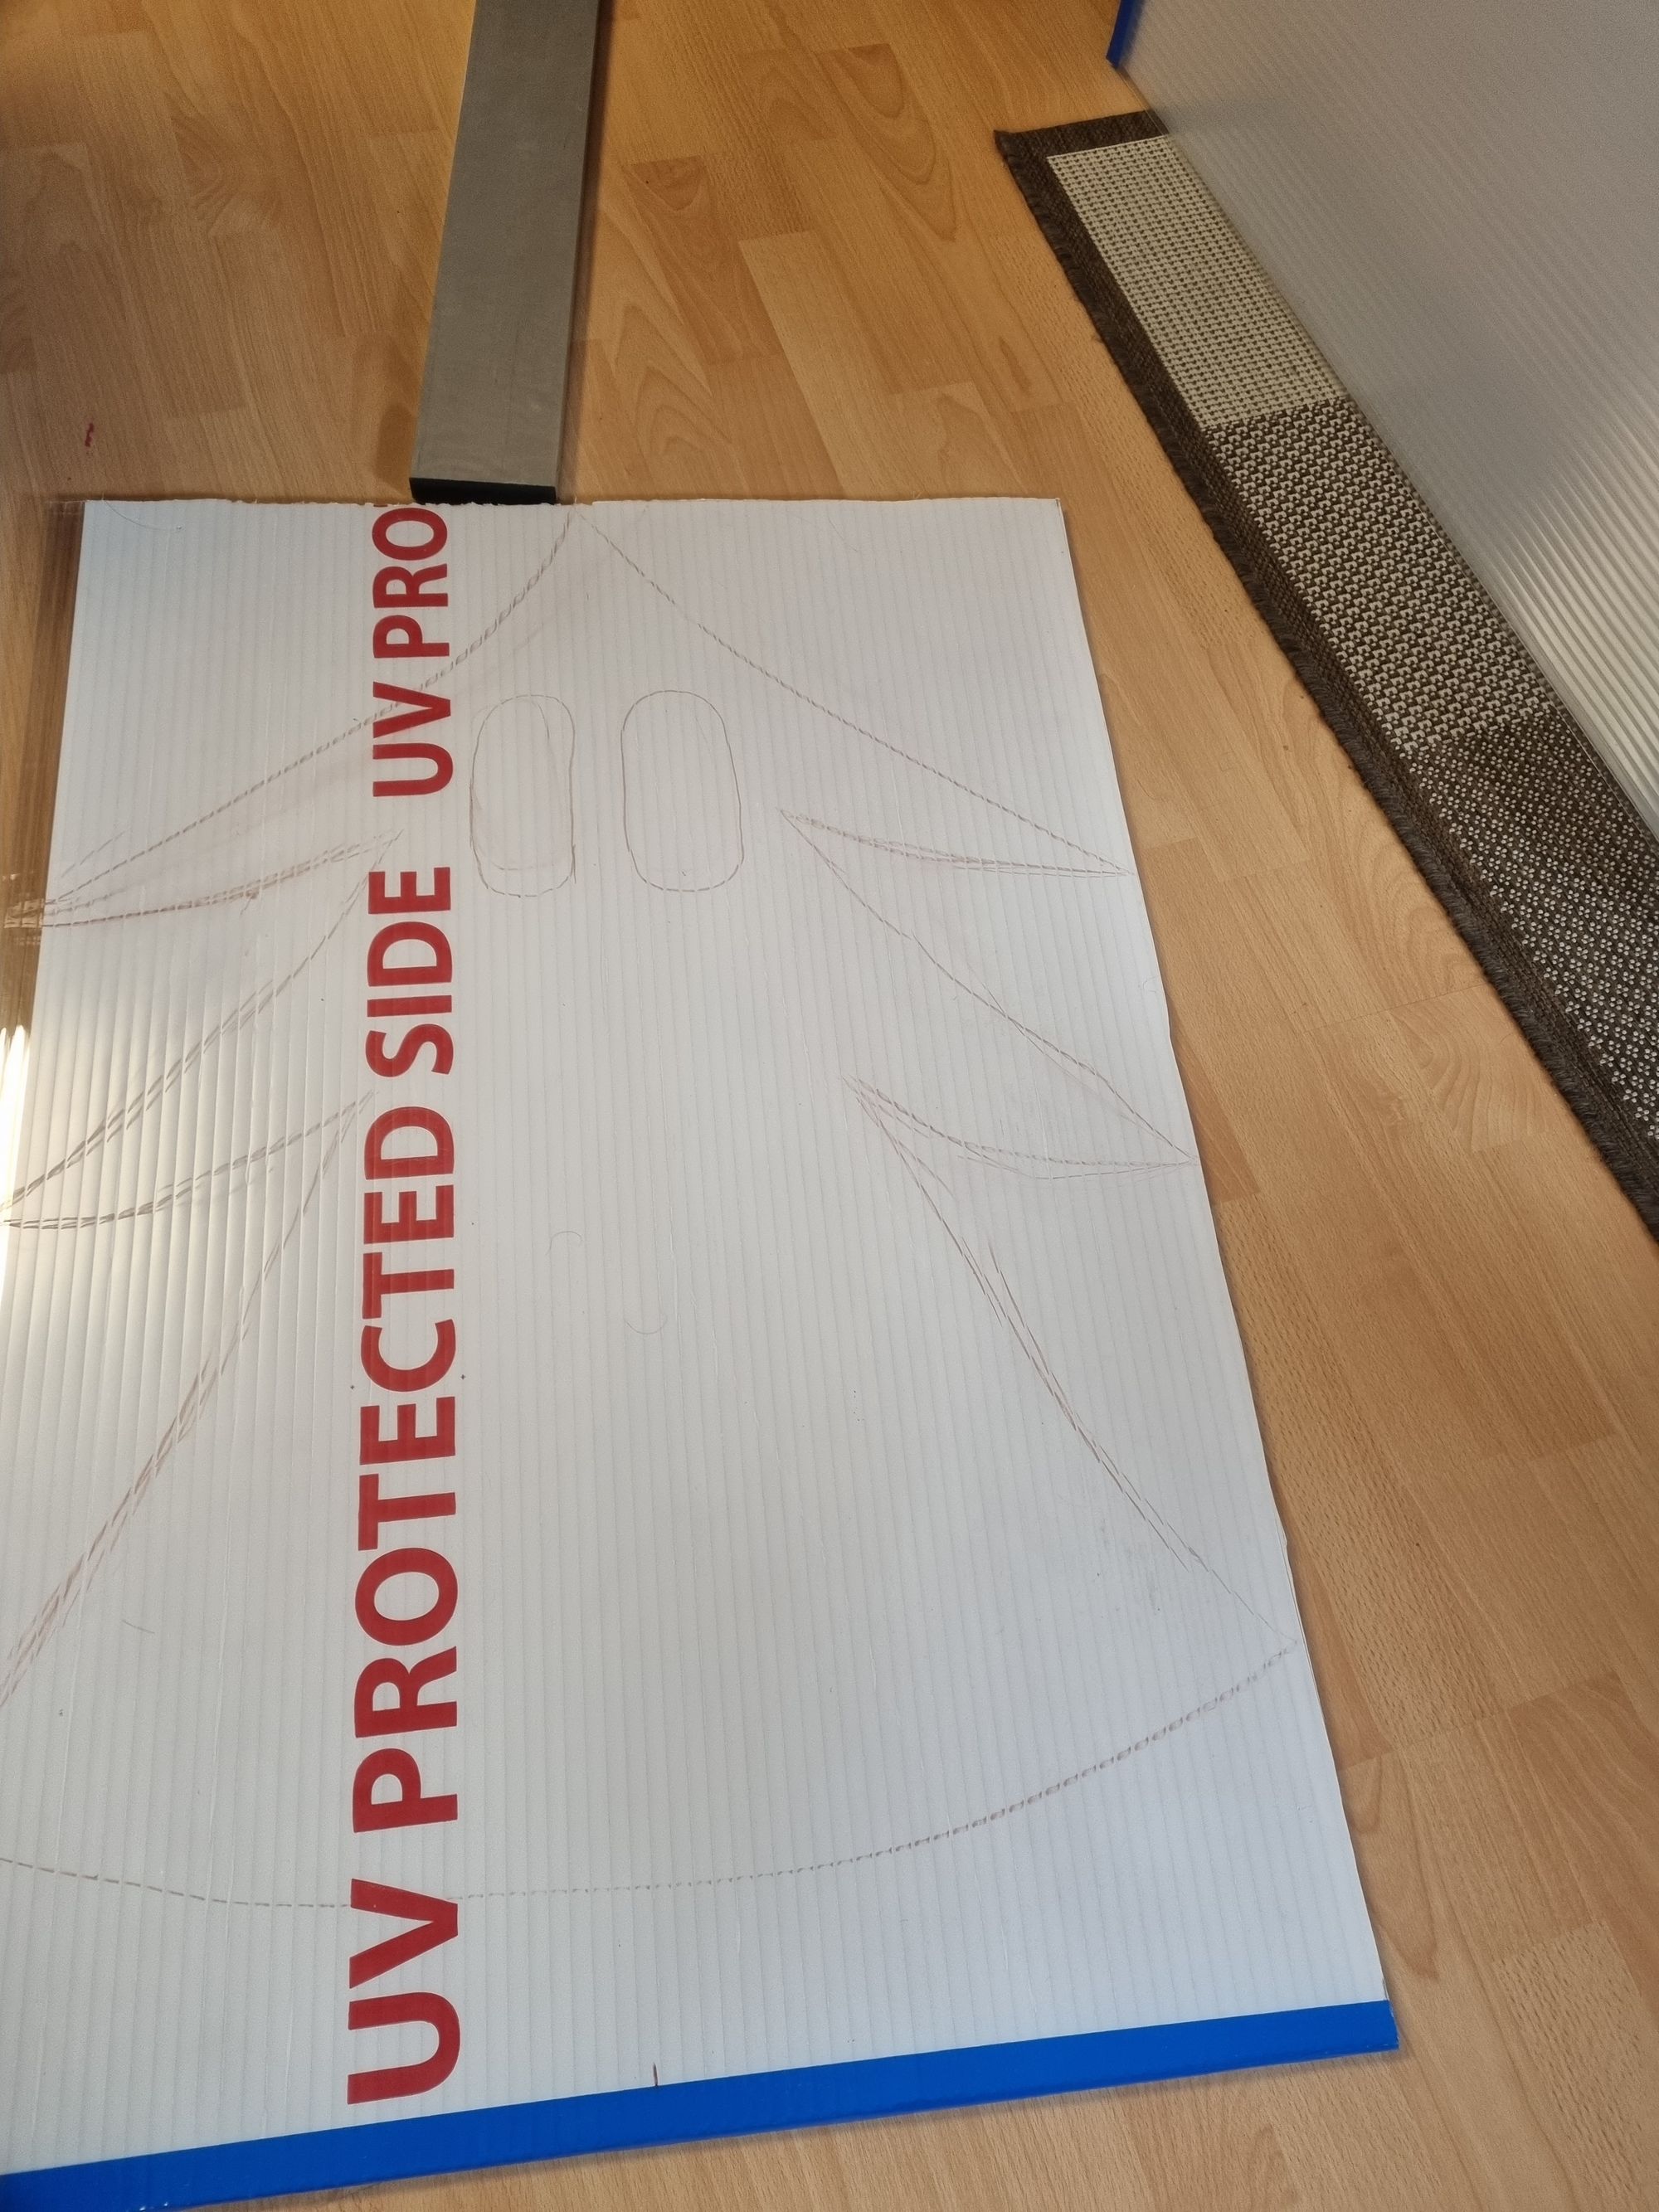
Next, I draw a wide-open mouth, a closed mouth, and a rounded mouth (for the Oh’s).
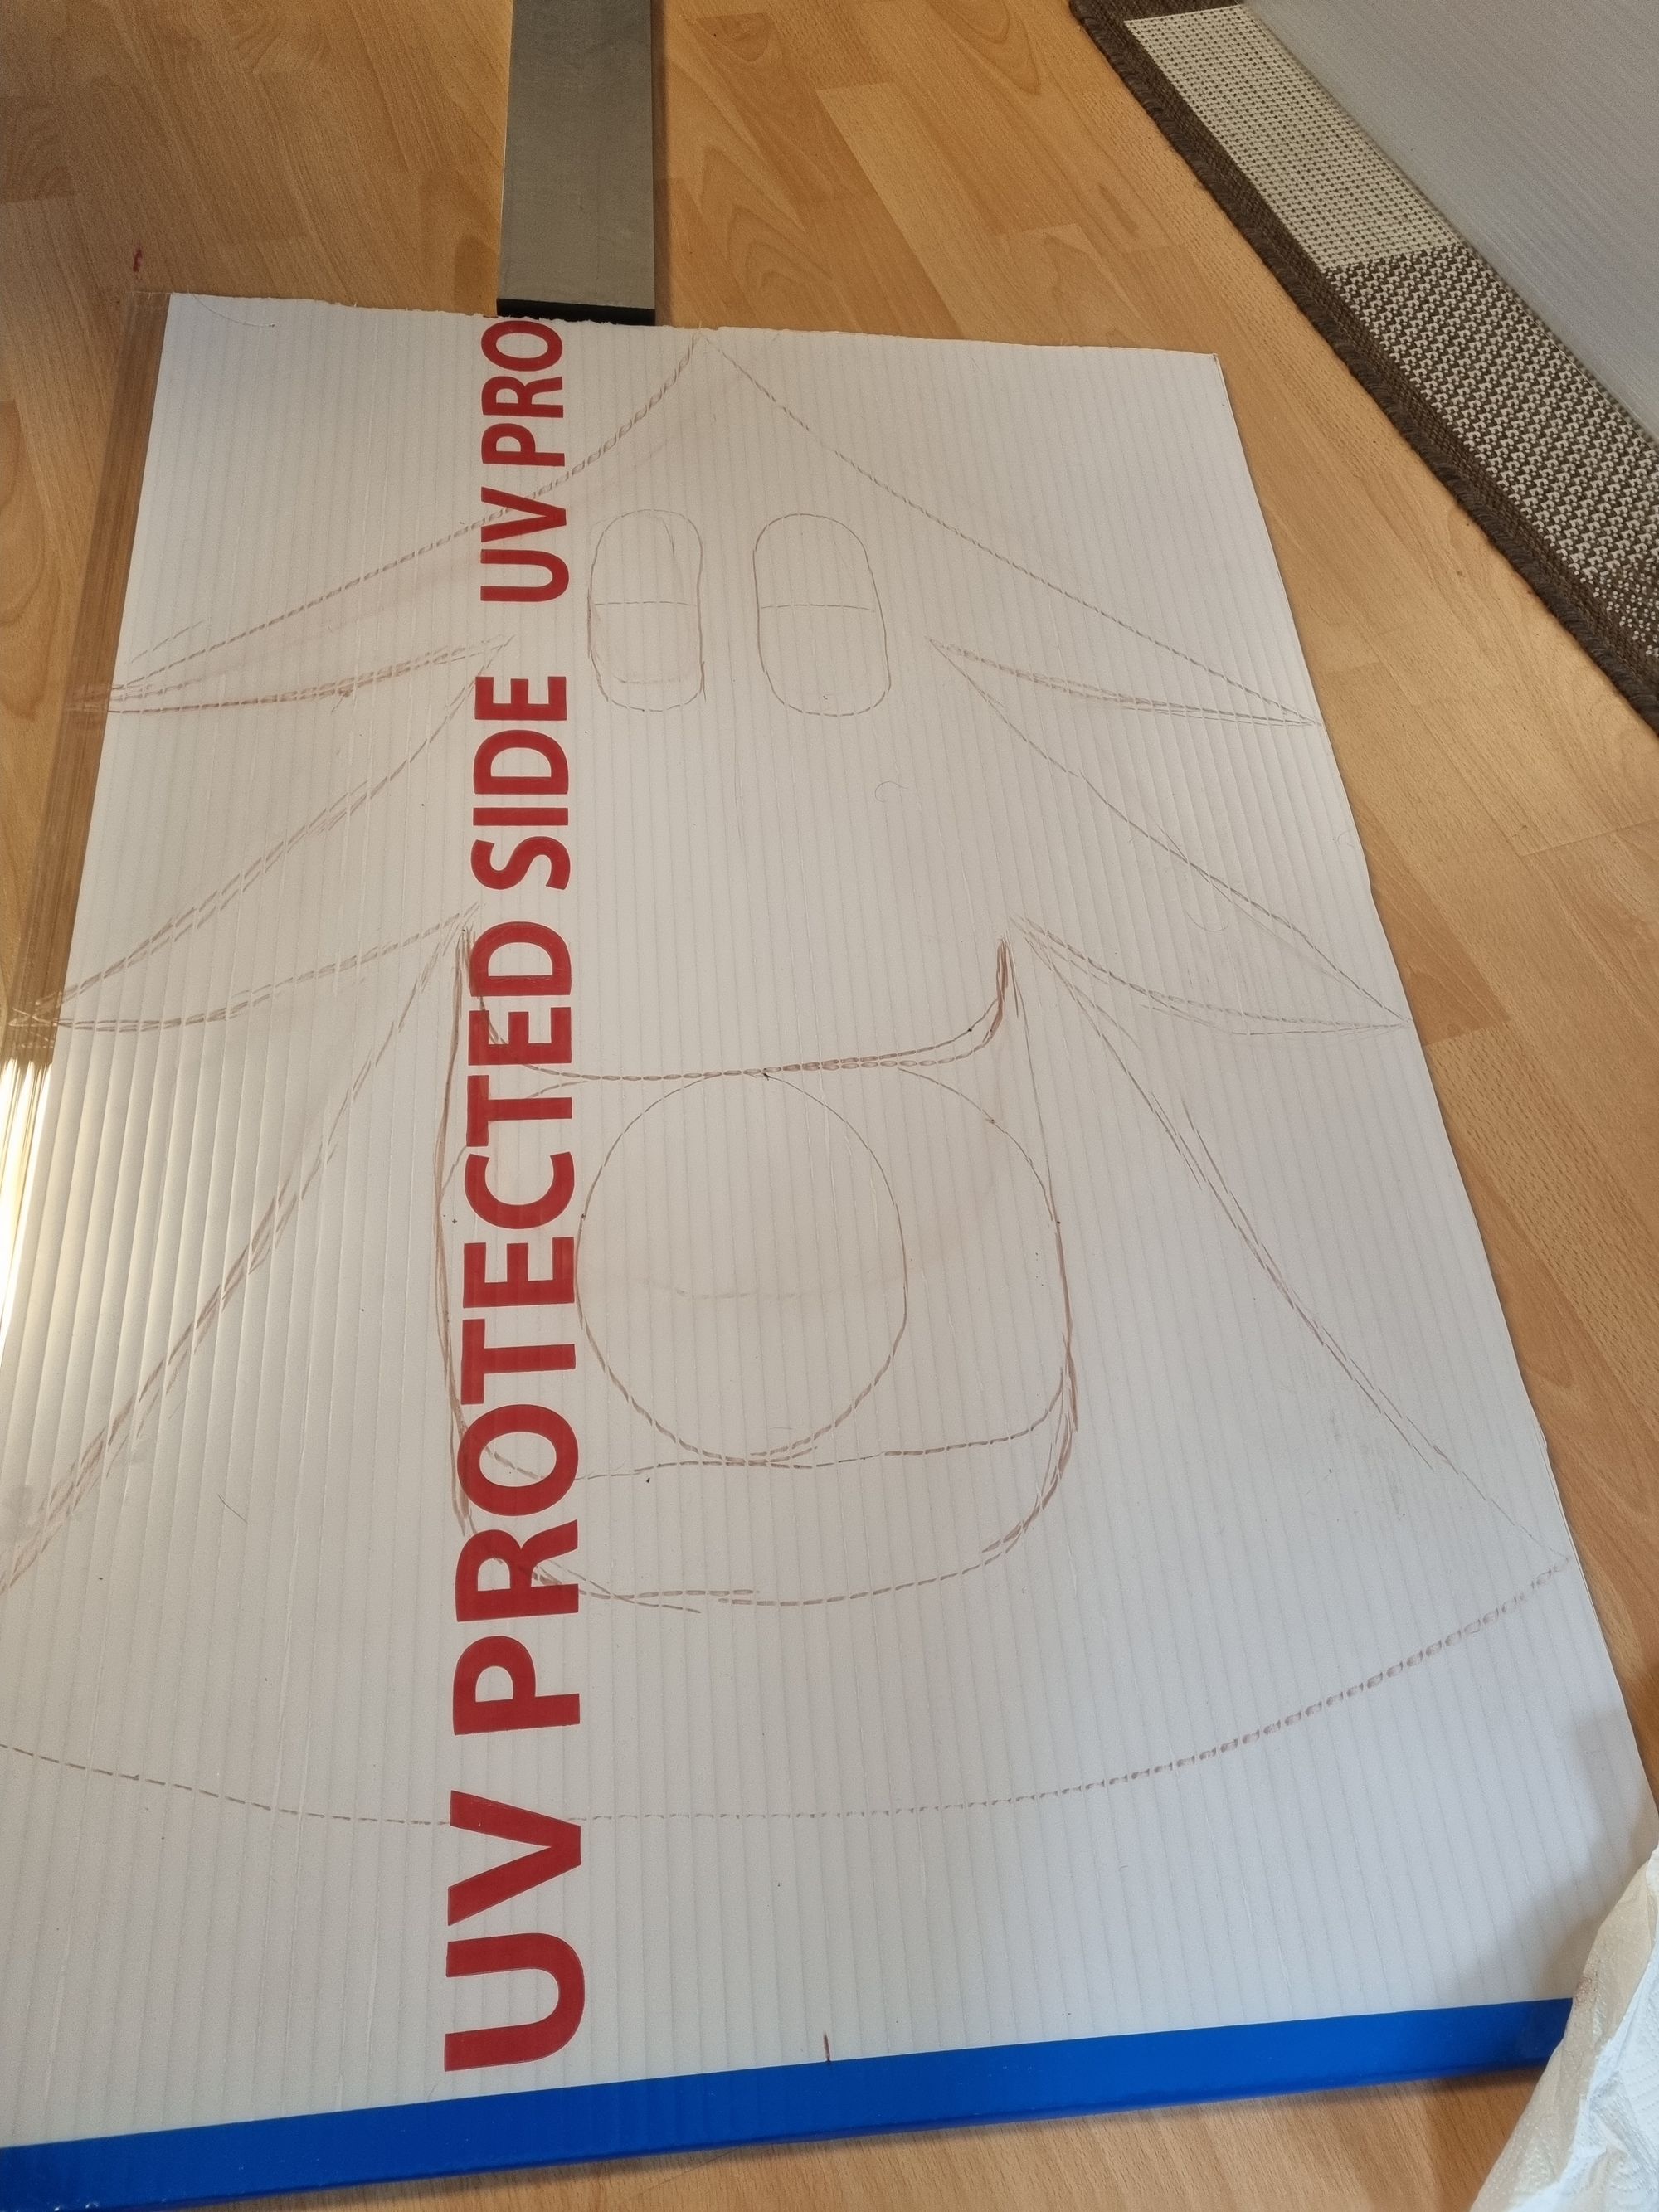
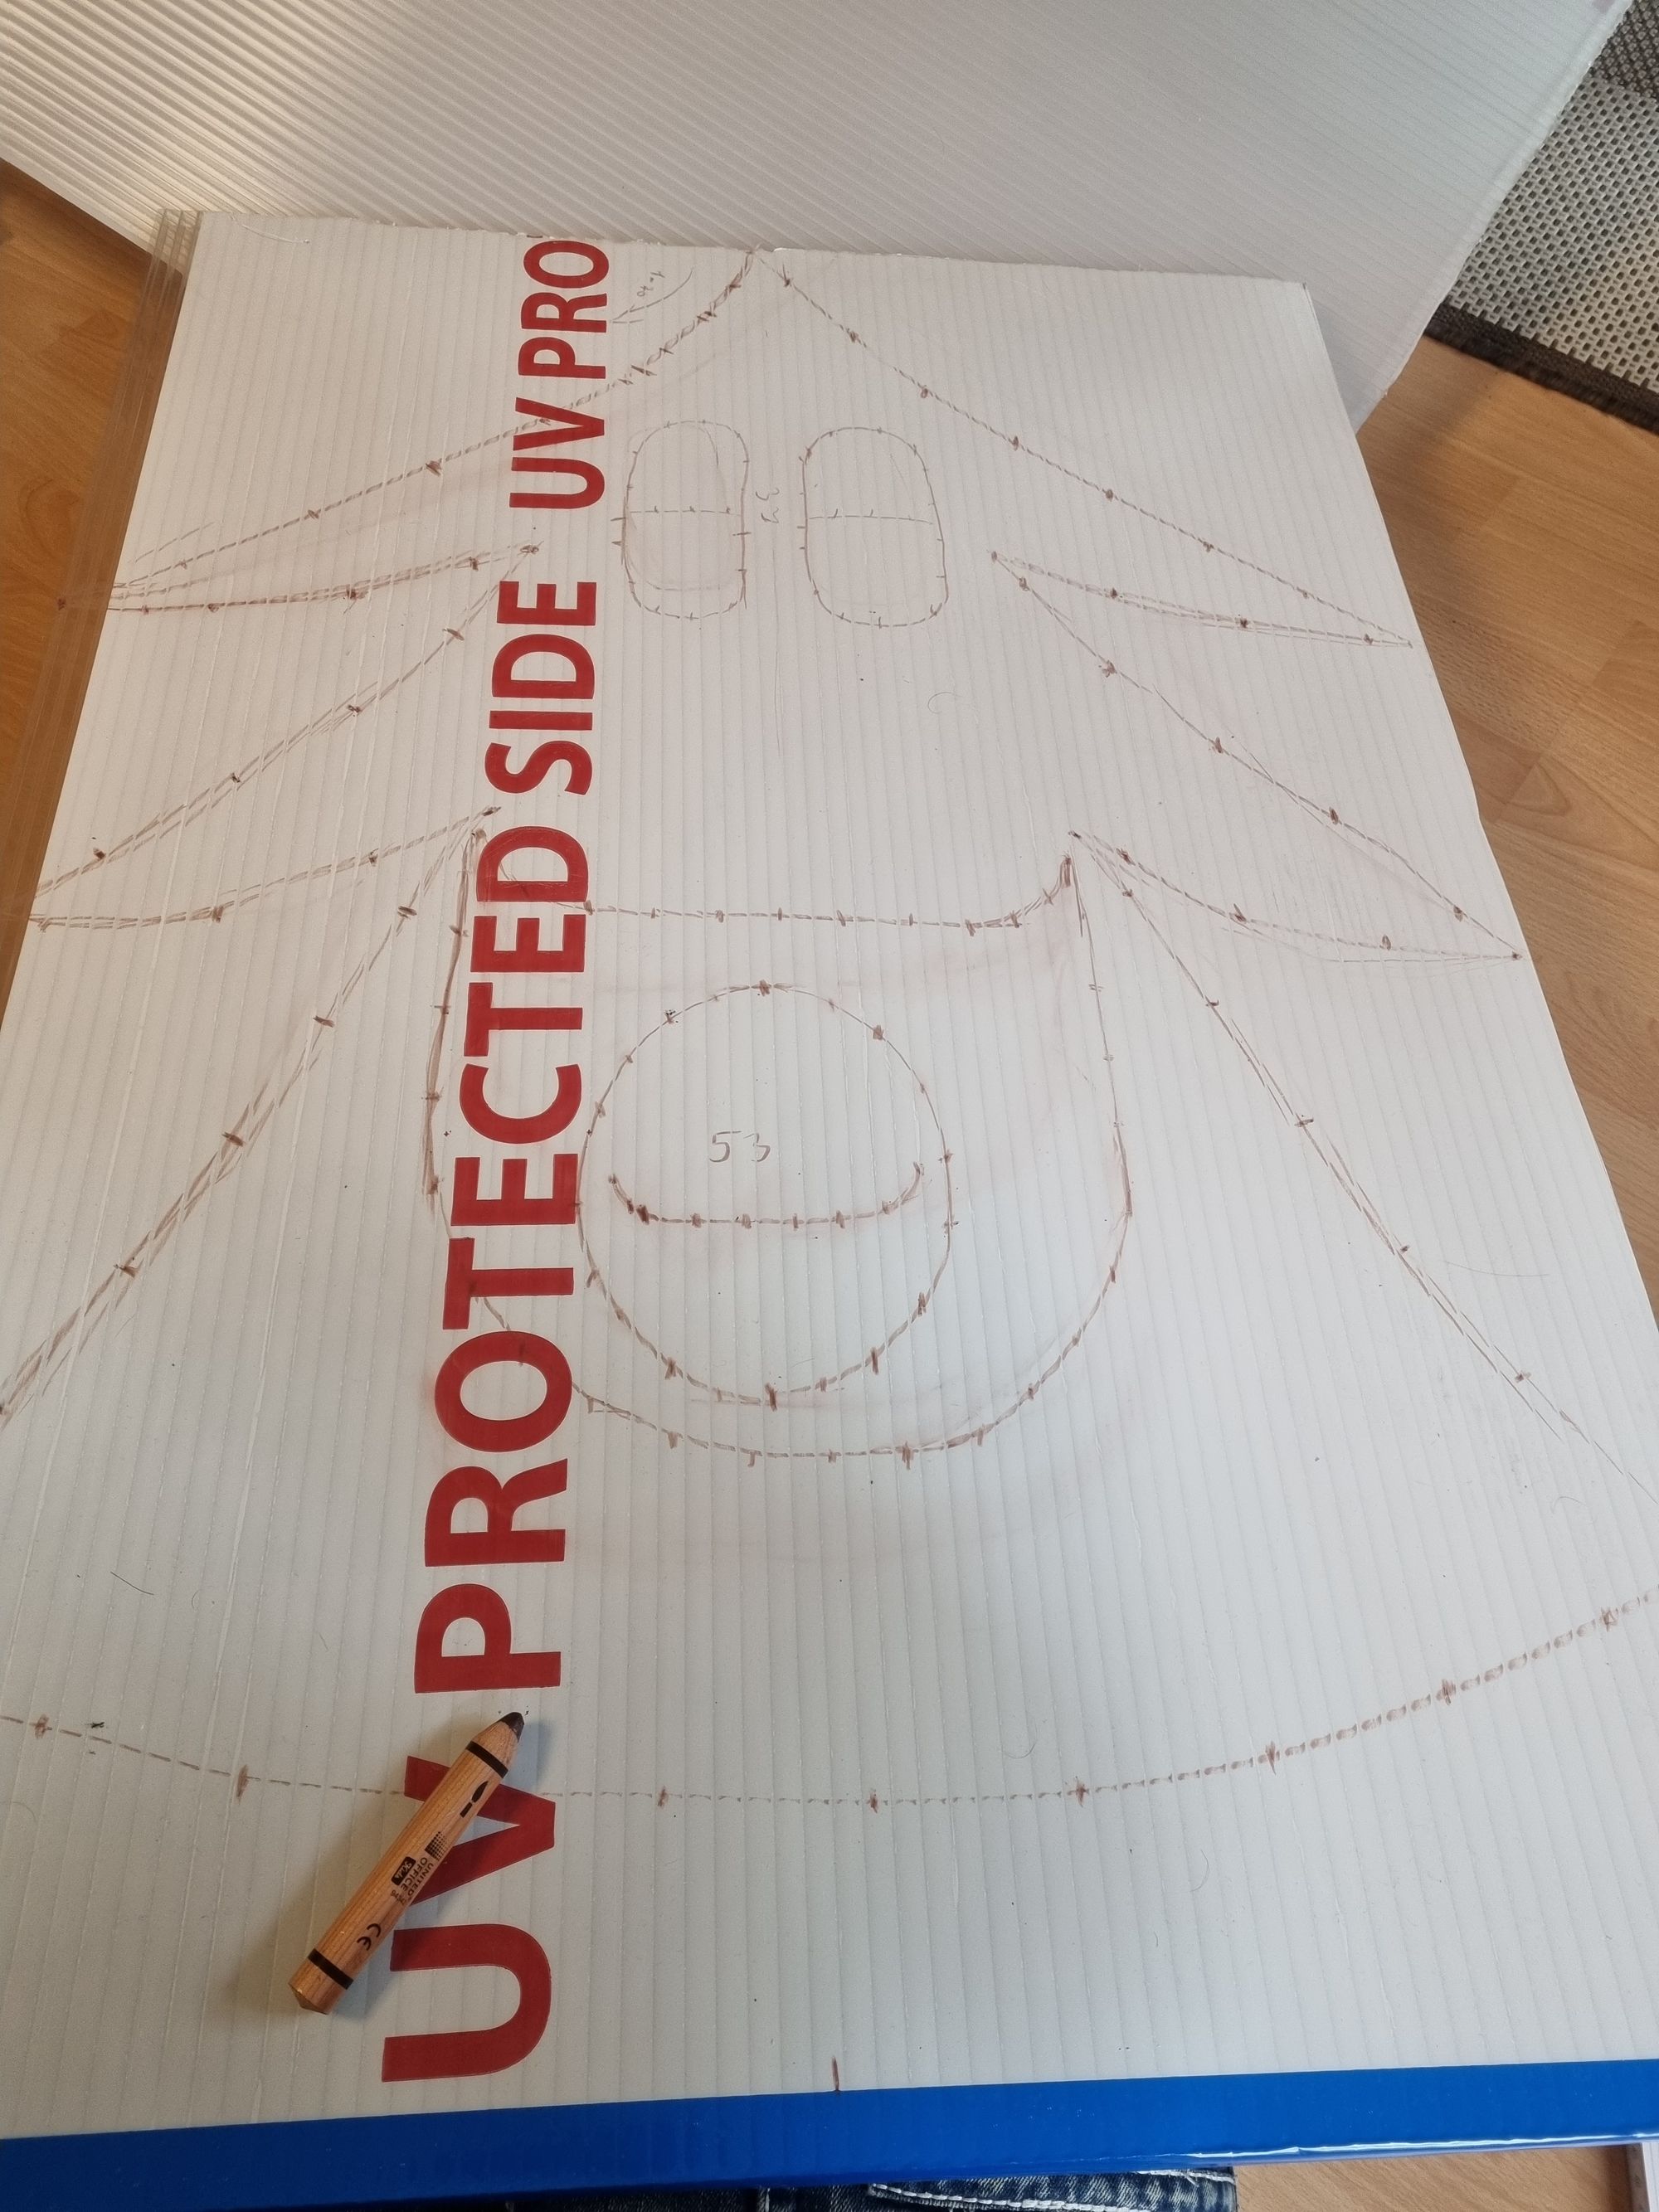
Finally, I drilled distributed hole into the sheet across the line. Please pay attention to measuring the distance between every led light and use this measurement to use this as the gap between the holes. For my led’s I used a 10 mm Drill hole. In which I easily put in the leds.
Assembly the lights
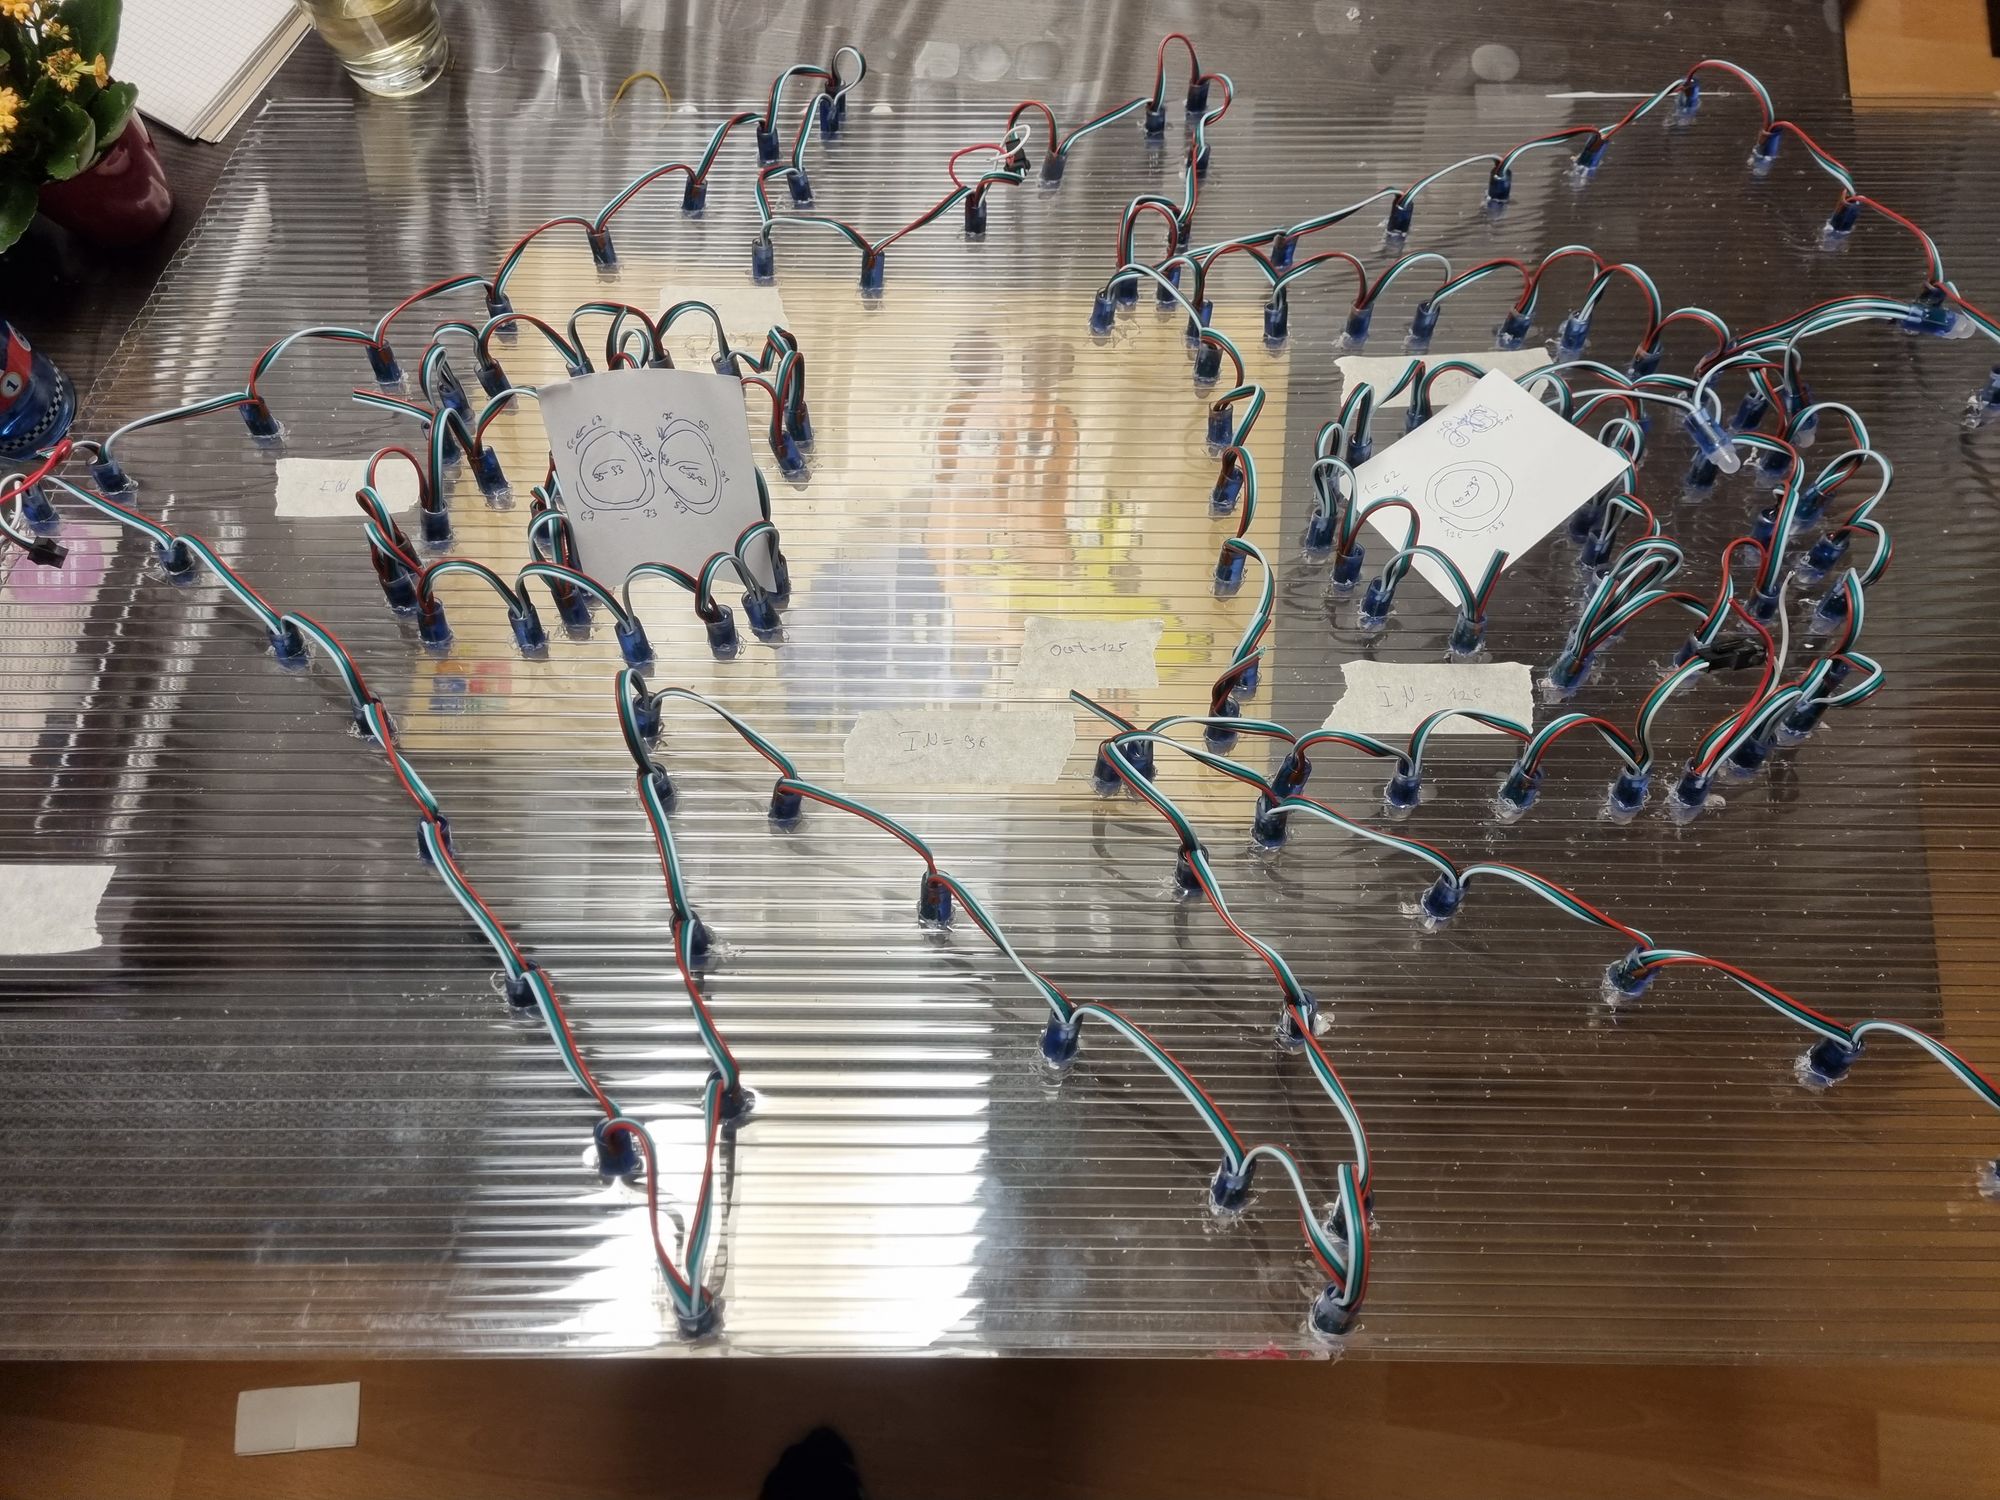
After we drilled the holes, its time to add the strips to it. Before you stick the buolbs into the holes you must pay attention to the right direction, because on each strip you will notice a small arror, this tell us the direction of the lights. While you put the Bulbs into the holes please write down the amount of bulbs and in which area (mount, eye, border) they are. I used a small note for this also I write down the input and output on each end of the stript. So I can then easily solder them together.
The soldering
Because you cannot force to use one strip to another, you might cut some in a half. That’s not a problem, but you must pay attention to solder this the right way. Because the direction is only in one way (indicated by the arrows on the strip). For that you have marked the in- and output. After the soldering is done, you have the tree assembled.
After you are all wired up and mounted together, please use a measuremnt tool to double or trmeasurementipple check the soldered cables.
Programming the controller
Sure I can tell you some stories about the E1.31 Unicast protocol. But that seems boring for everyone. Let’s imagine that this protocol will be used in the light industry to control lights (doesn’t matter which one) on distance (per wire and wireless).
Our tree is acutally naket, It cannot shine or s.th. so we must have attached a microcontroller or s.th. else. SO after a little bit of googleing arount, I found a Sofatware that will support the E1.31 protocoll and works via WIFI. Ist's called WLED.
Simply upload the firmware via Install WLED and configure it to get access to your WIFI.
After that I wired the black cable to the Ground and the red cable to the 5 Volt. The white cable (Data) will be wired to the D4 pin on my ESP. This is the default pin that WLED will use. Sure you can use another pin if you want, that does not matter.
There will be light
After soldering it through the pins, and plug in the USB cable to the ESP device. The first led will shine. So what's wrong? Only one led? Sure the WLED Software doesn't know how many LEDs you will use. Now It's time to look on your notes, WLED needs to know how many led's are connected. After you configured it in the WLED Settings, the treff will beginning to shine
Fancy, but it's not singing and all bulbs are shining. So now it's time to define the areas on our tree.
Set the Areas
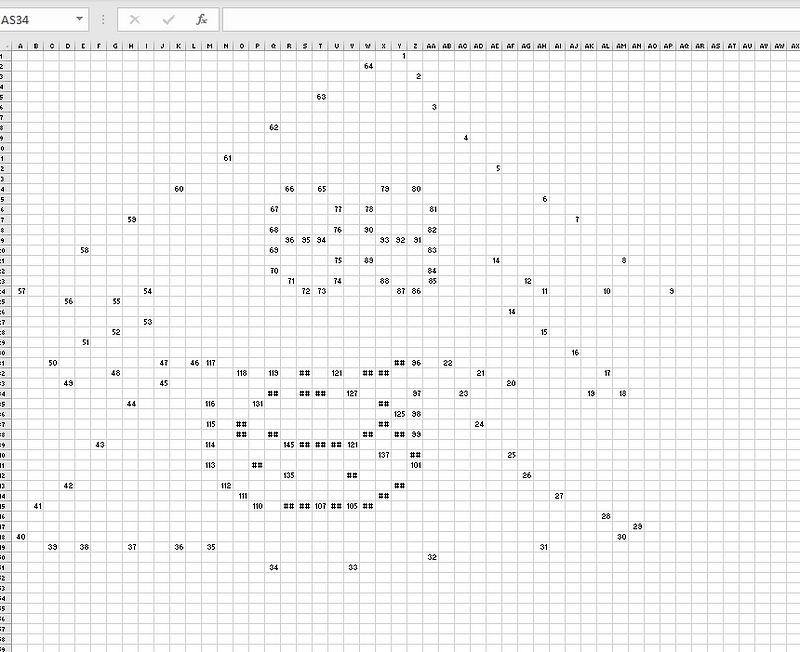
To do this I use the programm xLights, this tool will be used to control the complete tree and define the complete areas. Tio generate the areas start with an excel. Please believe me, it's much simpler with excel. In this excel, you must layout your tree to match the bulbs on the phyiscal tree. So please pay attantenion to get the right dimension about this. I must regenerate this 5 times to get the right layout and end up with this:
These will be imported later and will be shown in xLights as your own tree like this:
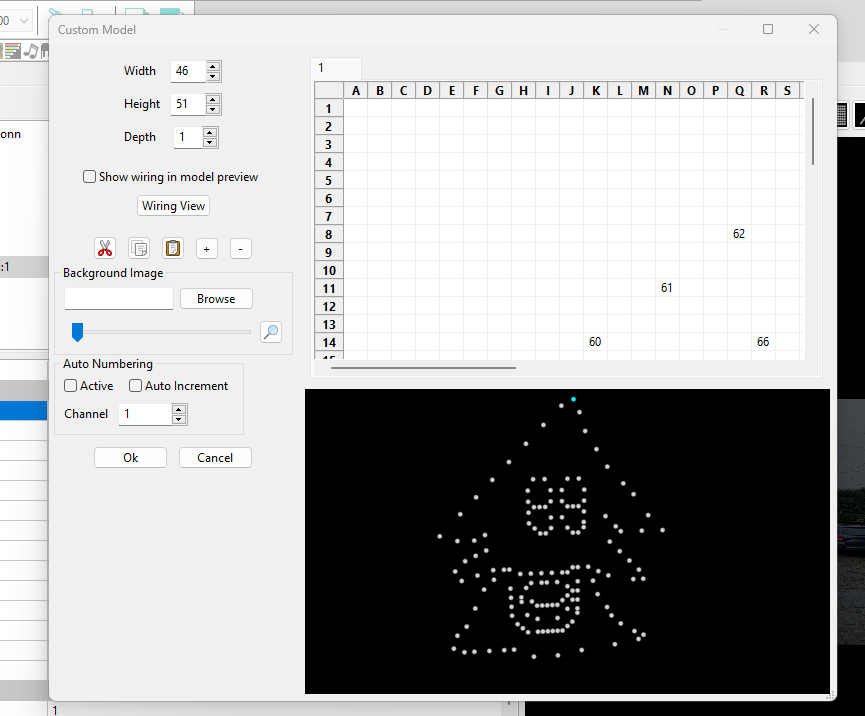
Let me give this youtube link four you as a simple help on how to import this.
Define the areas
Now it's time to define the areas. For this you must select your model in xLights and edit the faces
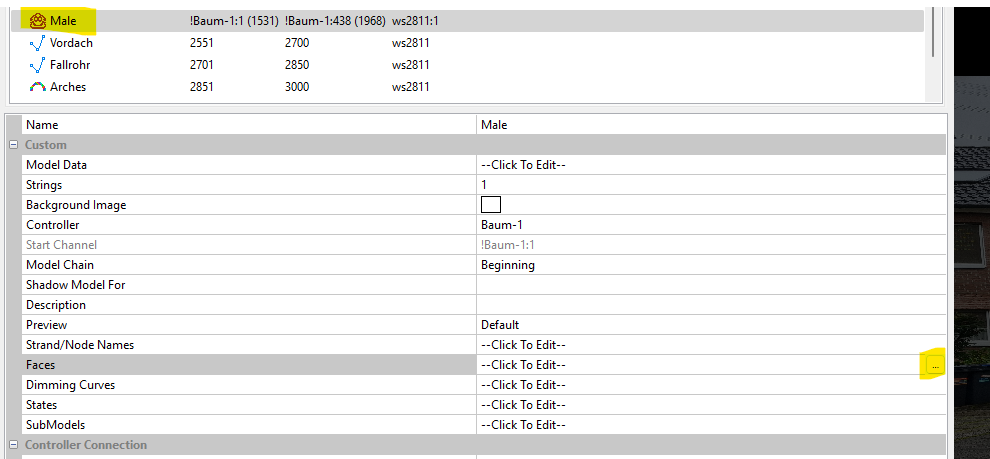
After this, you will be able to set the ranges for the desired leds that will represent the right face for my tree it will look like this:
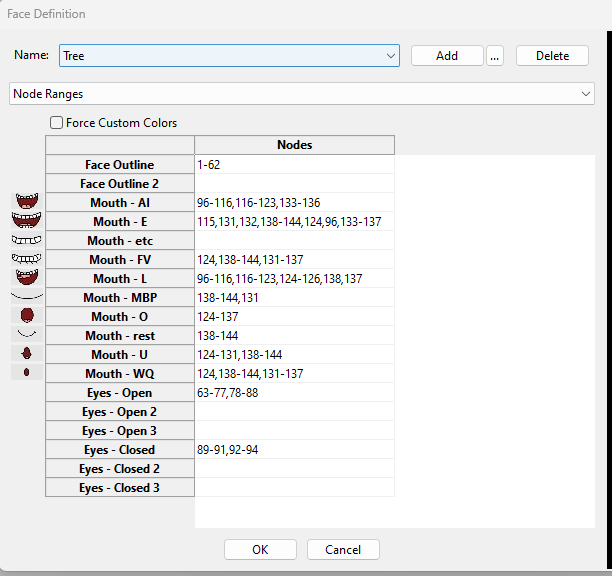
Please double check the numbers and also AGAIN double check the correct bulb order ;).
Create the sequence
Now the second important part. We want to creat the Sequence so that the tree will be able to sing. For this you must have the Songtext and the Audiofile itself (as mp3) of the preffered song. There are many ressources online for this, grab any song an put it into a texteditor.
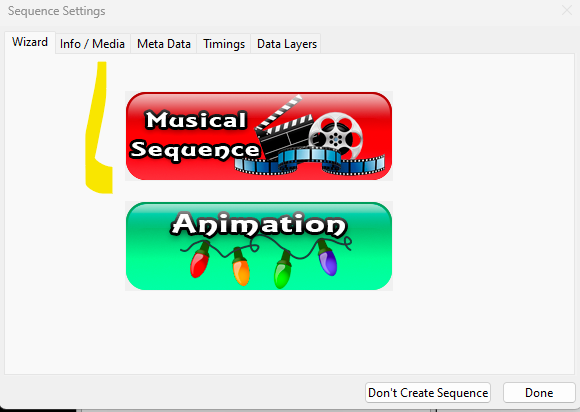
Now we want to create a new Sequence in xLights after that select Musical Sequence
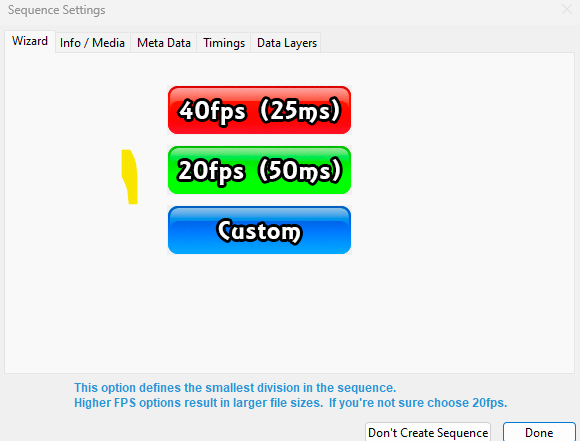
Next you must select the Audiofile. In the next Step you must select the FPS (Yeah it's really an fps ;)). Select here the value 20, because mp3 will noch be able to get above this value.
Then click done. So now you can start to insert the vocals.
Please right Click on New Timing and Import Lyrics
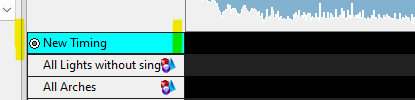
Next you can paste the Lyrics from your text file into this Window. As final step, you must set the Startpoint when the Singer begins to sing. Hit Import and aftert his you will see that the lyricy will be inserted.
After that you right click on the row where your lyrics will be shown and select "Breakdown Phrases". This will deivide each word into it's own vocal and phrases. This will breakdown each word into it's phrases like A, O, U, ei and so on.
Now the Timeconsuming part, you must manually assign the Phrases on the correct position to match the words in the song. You can simply move the words to the correct position. This was all for now. When you connect the xLight to your Tree (via Wifi Ethernet).
Click on the White Bulb and after that on the Play button

And with a little bit luck, you will see the results like the following
Did you like this post? So please leave me a comment as feedback, Questions and recomendations are also welcome.

