How-To: Syncing users between SAP and Entra-ID.
In my post about adding Entra ID to SAP, I described how to connect SAP and Entra ID. It's highly recommended that you change it to another IDP like Entra-ID because the SAP IDP (or in german SAP IDM) will be retired.
At this point, you will only be able to log in via EntraID and SSO through each SAP module. But the problem is that users already exist, so you cannot preprovision users to the desired security groups.
Configure User Assignments
It's recommended to assign users to the Enterprise applications so that you don't add the entire organization to the SAP System. This can massively affect the license costs. To enable user Assignments, you must navigate to the Properties Entry and set the "Assignment required?" to "Yes."
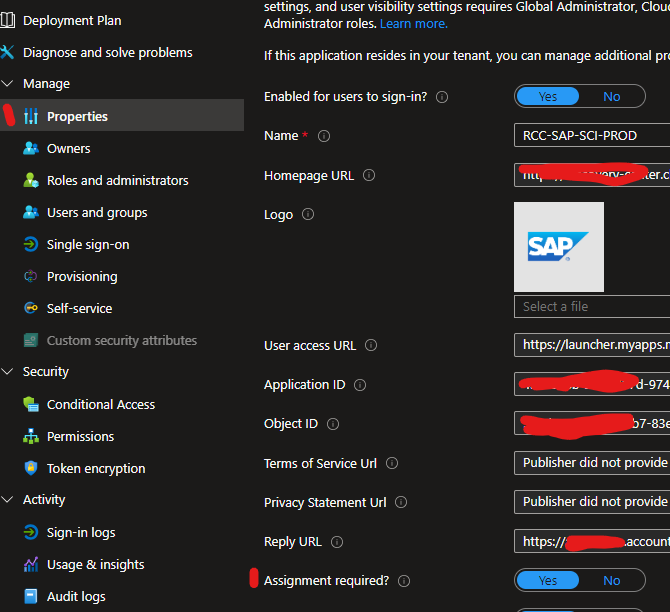
Now you MUST add users to this Enterprise Application so that the users can access this System.
Do the SAP Settings
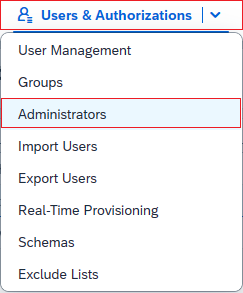
You must getting some data from the SAP IDP. After navigating to https://<tenantID>.accounts.ondemand.com/admin you must open up the "Administrators" entry.
Now you click "+ Add" and then "Add system". You will then see the creation dialog. In this, you must configure the Authorization and activate the "Manager Users, Read Users, and Manage Groups" Role. Because the connected app needs permission to add users and maybe roles (if you want).
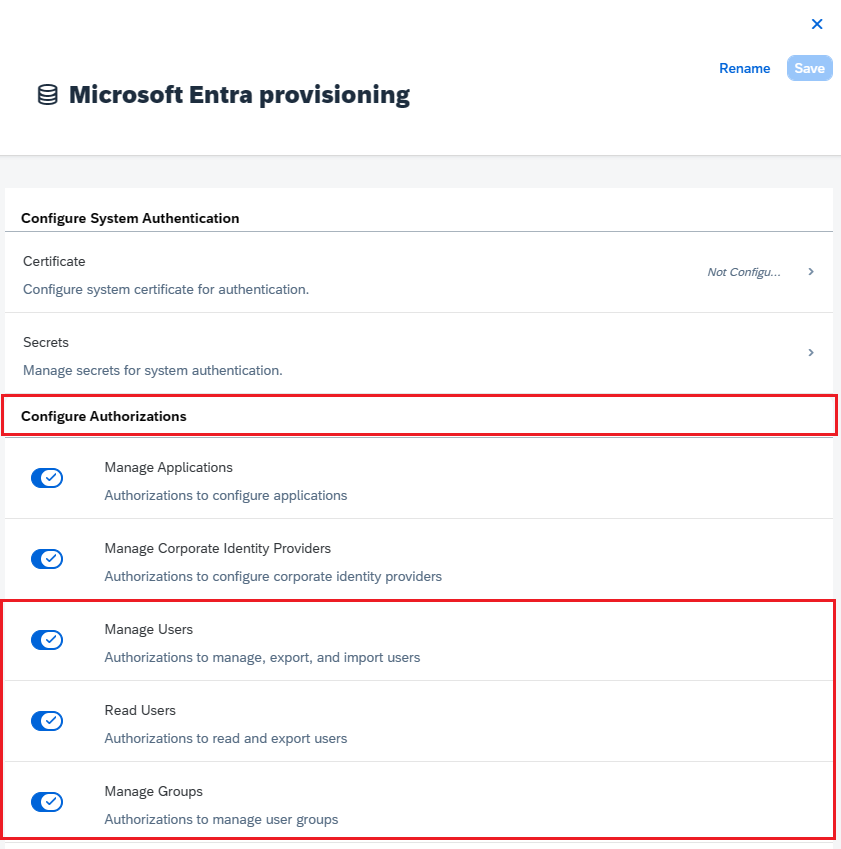
After saving, you must add a new secret key (that's a no-brainer ;)).
So now you have the following Properties
- ClientID (for Example 4a526259-69a4-4167-a68f-a9d9c7a71892)
- ClientSecret (for Example: . )
- Tenant URL (https://{yourtenant}.accounts.ondemand.com/)
I will skip the mapping of claims or other things because I will take a separate post 😄
Now that you have the basic requirements, you can configure your Enterprise Application within EntraID.
Configure Entra-ID
Let's open up the Enterprise application using Entra ID. On this page, you will see the Entry "Provisioning":
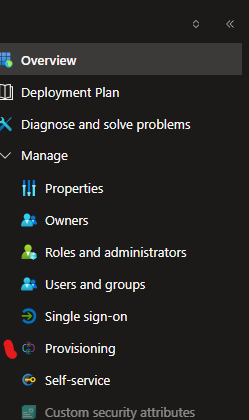
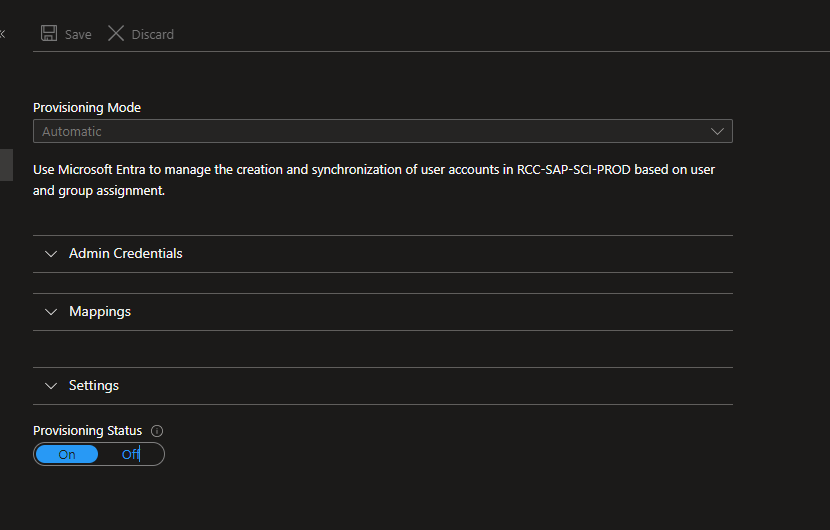
After clicking on this Entry, you will be directly prompted with the configure page. In this, you must fill in the data that we gathered from the SAP before. Please configure it as an "Automatic" sync. Otherwise, you must start it manually every time.

Please notice that the URL needs an extra "service/scim" appended!! otherwise it will not work.
Now, you can hit the "Test Connection" Button. This will perform an authentication test against SAP and check the required roles. If it succeeds, the mappings tab will appear.
Assign Users
There is no user assigned, so synchronisation is now possible. Adding users is very simple. Navigate to the "Users and groups" entry and add Users or Groups.
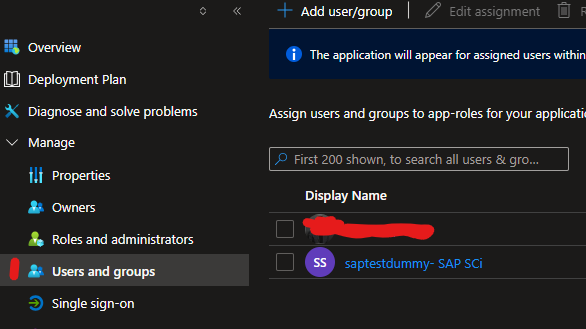
You can also assign Dynamic groups so that you can onboard users to the Entra ID and it will be assigned/provisioned automatically to the SAP system.
Doing the provisioning! Baby....
Now, after all the configuration is done, it's time for the provisioning. As you saw, I created a test user that must be provisioned to SAP. To start a sync, you must go back to the provisioning Entry below. It will then present you with another page. At the top, there is a button "Start provisioning." In my case, it's greyed out because it's actually running. So you can start it on your tenant.
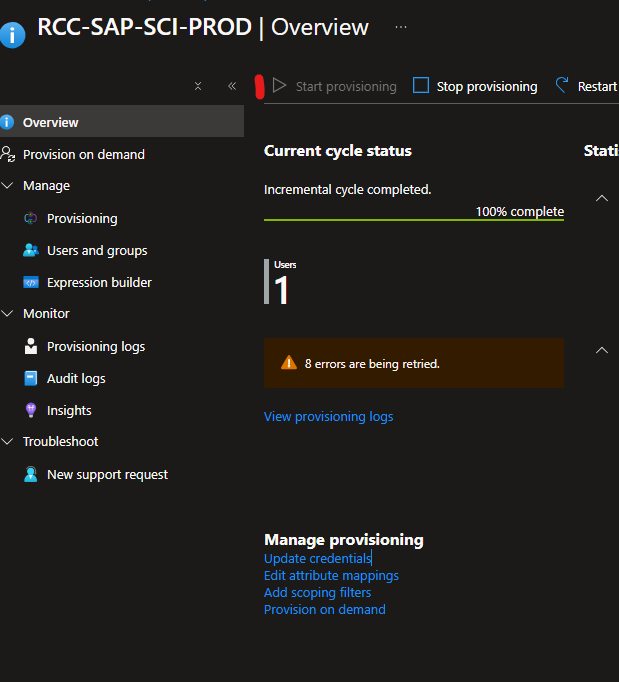
You can check the sync results than in the "Provision logs" entry.
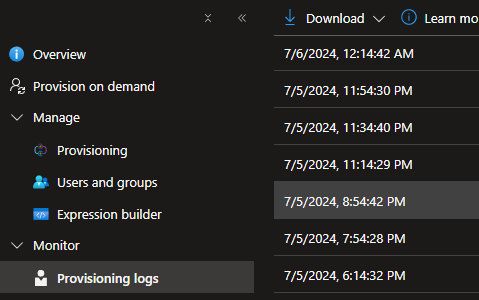
In this, you have a very detailed list of every sync step. At this point, I see that the test user was created

The details page looks like this:

You will now see the created user and the confirmation that the user was created in the SAP system. You can look into the "Modified Properties" Tab to see which properties were affected. In the creation mode, it will fill out all properties that are initially required (or configured via the mappings tab).

I removed the user's assignment after this test to check if the provision will delete users.
Force Provisioning
You can also force a provision of a specific user for testing purposes. In the overview, you see the button "Provision on demand".

This will open up a new dialog where you can select one user (or group) to make a direct provision. After hitting the "Provision" button, the selection will be directly provided.

The result will be shown directly
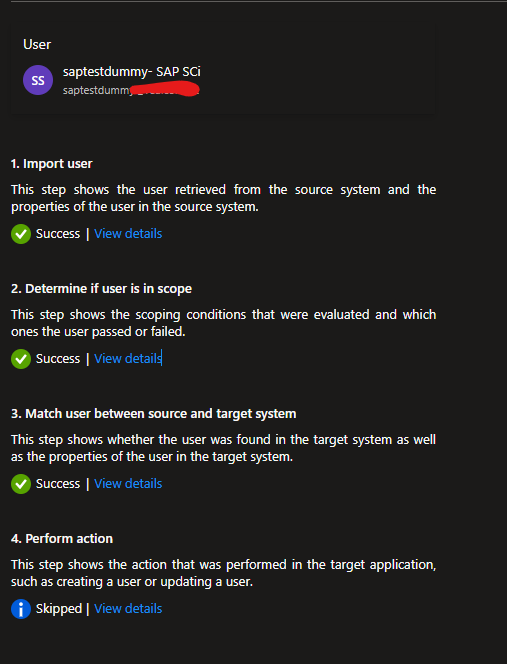
you'll see that the action will be skipped because the user already exists.
Conclusion
Provisioning users to other systems is necessary; otherwise, the administration overhead will increase. Automatic provisioning will help every administrator keep all systems in sync.
You are very flexible in provisioning users and groups, and you get all the insights that you need, too!
I hope that this post will help you configure your organization to auto-provision users into SAP itself.